Don't Fear the Repair: A Systematic Guide to Fixing Gadgets and Radios
Stop throwing away "broken" gadgets! Learn how to troubleshoot and repair 75% of common electronics faults using simple, systematic steps—from cleaning switches to neutralizing battery leaks.
Practical fault-finding includes:
How to debug a newly designed PCB / assembly
Fixing radios & other gadgets - first steps
Systematic fault finding
We have all been there - a favourite vintage radio stops playing, a reliable gadget suddenly goes silent, or a beloved piece of equipment simply refuses to turn on.
The modern inclination is to label it as "junk," reach for the nearest screwdriver to take it apart, and immediately assume the worst: a blown microprocessor, a fried integrated circuit, or a catastrophic board failure.
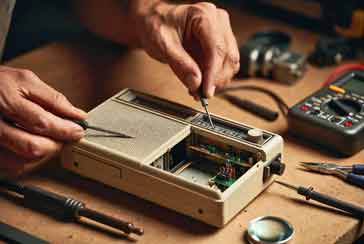
However, as someone who has spent years at the workbench, I am here to tell you to stop overthinking the problem. The reality of electronics repair—particularly with consumer gadgets and radios—is surprisingly encouraging.
In my experience, roughly 75% of "broken" electronics are actually suffering from trivial, easily remediable issues. Before you consign a device to the landfill or attempt a high-level repair you aren't prepared for, you need to follow the golden rule of electronics: Check the obvious first.
This article is your guide to bypassing the panic and tackling the simple, mechanical, and environmental issues that account for the vast majority of equipment failures.
Video: My Secret Method for Fixing Radios & Electronic Gadgets
The Power Foundation: Batteries and Connections
The most common point of failure for portable electronics is not the circuit board; it is the power delivery system. In my experience, there are two main causes for this as we see below.
• The Classic: Leaked Batteries
If you are dealing with a device that has been stored in a cupboard for months or years, the first thing to inspect is the battery compartment.
Alkaline batteries, even though they are often thought of as being 'leakproof', they are notorious for leaking an alkaline electrolyte that eventually crystallizes, creating a crusty, white, powdery residue.
This residue is not just unsightly; it is an insulator that breaks the electrical path between the battery and the terminal.
To fix this:
Mechanical Removal: Use a small stiff-bristled brush to remove the loose, dry residue. Wear gloves and eye protection if the leakage is significant.
Neutralisation: Because the leaked material is alkaline, you need to neutralize it. A small amount of dilute lemon juice or white vinegar on a cotton swab works wonders. The acid reacts with the alkaline residue, causing a mild fizzing reaction.
Final Clean: Once neutralized, wipe the area clean with a damp cloth (using minimal water) and ensure it is bone-dry before installing new batteries.
• The "Silent" Fault: Loose Wires
Many radios and portable gadgets suffer from wire fatigue. This occurs when wires are bent backwardsand forwards with use.
Only recently I was asked to repair a radio for my daughter and the major issue was that with extensive use the external power supply wire had broken. It actually looked quite bad.
I confirmed there was no output from the supply with my DMM, but in reality, it was obvious this was an issue.
So just by looking at the external wiring, it was possible to find the issue.
Fortunately many of the issues with radios and other gadgets tend to be fairly obvious like this one.
So the motto is keep your eyes open as visual inspections can often very quickly reveal the issue.
The Mechanics of Connectivity: Switches and Contacts
Over time many contacts can get dirty. Not only does oxide build up, but grease and dust can enter the equipment and play havoc with some open switches and connectors.
• Rotary Switches
Vintage radios and other old equipment equipment often utilize multi-position rotary switches.
Over decades, dust and oxidation accumulate on the sliding contacts, creating a high-resistance barrier that prevents the signal from passing.
There are many ways of solving this issue, many of which are very easy.
Use the switch: The easiest way to shift some of te dirt and grease is to use the switch - rotating the position of the switch. This can often help break through the accumulated dirt. However once this has been done, it is always best to remove allt he dirt by properly cleaning the switch.
Chemical Cleaning: Start with a high-quality electrical switch cleaner (a contact cleaner spray). Spray it into the switch mechanism while rotating the switch back and forth several times to "work" the cleaner into the contact surfaces. Although these days switches and he cleaners do not react, many years ago I used a switch cleaner that reacted with the centre pole of the switch and I had quite a job fixing it - the motto is, check before using!
The Paper Technique: If a spray isn’t enough, try the "paper trick." This is soemthing I've used on many occasions. Take a small, clean strip of paper and slide it between the contact leaves. The paper acts as a very mild abrasive. As you pull the paper through, it physically lifts the stubborn oxidation off the metal. It is a simple, low-tech solution that often brings dead equipment back to life.
• Dirty Connectors and Plugs
Anywhere two pieces of metal meet to pass a signal, you have a potential failure point. It is very similar to the issue with the rotary switch where dirt, oxidation and grease can accumulate over time.
There are several easy ways of overcoming this.:
The "Break and Make" Method: That's a posh name for saying disconnect and then reconnect the connector. It is surprising how many times this works. Sometimes, all a connector needs is a bit of movement. Unplugging and replugging a connector a few times can break through a microscopic layer of surface oxidation and enable the connection to be made again.
Physical Cleaning: If the connector is exposed, use a small piece of paper or a specialized contact cleaner to gently abrade the surface. This is particularly effective on battery spring contacts or headphone jacks that have become oxidized.
The Volume Control: Tackling the Scratchy Potentiometer
Another common problem with older radios, amplifiers and some other devices using tracked potentiometers is the horrible and often lod scratching noises when the pot. is rotated.
Sometimes these noises can be just annoying crackles as the control is moved, but other times they can be very loud.
Whatever the loudness of the crackle, if there is a crackling scratching noise as the potentiometer / volume control, etc is moved then this narrows it down to the control itself.
The reason is simple. Inside the potentiometer, a metal wiper slides across a resistive track. Dust, hair, and and general dirst can settle on the track, causing the signal to "jump" as the wiper passes over the debris.
The fix is almost always a blast of switch cleaner into the housing of the potentiometer, followed by turning the knob through its full range of motion a good number of times.
You will often feel the "scratchiness" diminish the more you rotate the control. Rotate it until the noise disappears, although occasionally a second burst of cleaner may be required if it is very dirty.
Other "Hidden" Simple Faults
Once you have cleared the batteries, switches, and connections, keep an eye out for these other common, easily solved problems:
The "User Error" Reset: In modern gadgets with microprocessors, a simple "hiccup" in the logic can cause the device to freeze. Look for a hidden reset hole or try removing the power for a full 60 seconds to allow the internal capacitors to drain completely. This "hard reset" often clears the memory and restores normal operation.
Dust and Debris: It sounds trivial, but I have seen devices rendered "unresponsive" because a piece of debris was blocking a button from making contact with the underlying membrane switch. A quick puff of compressed air can often solve issues with unresponsive remote controls or keyboard buttons.
The Philosophy of Repair
When you approach a non-functional gadget, I want you to shift your mindset. Do not start by looking for the most expensive or complex failure. Always start by looking for the simplest, most mundane explanation.
Electronic circuits are, at their core, a series of electrical paths. If the path is blocked by oxidation, a loose wire, or a lack of power, the device cannot function. By focusing on these physical realities first, you effectively troubleshoot the system from the outside in.
This approach serves two purposes. First, it saves you from unnecessary disassembly and the risk of damaging delicate components. Second, it builds your confidence. There is a profound sense of satisfaction in reviving a piece of technology simply by cleaning a contact or re-seating a wire.
That said, there are always times when the problems are more complicated, but check out my next article about the common faults in the electronic circuitry itself in radios and other equipment.
So, the next time you encounter a "broken" gadget, take a breath. Put the soldering station on standby. Grab your switch cleaner, a bit of paper, and a fresh set of batteries. The solution is rarely as complex as you fear—it is usually waiting for you in the obvious, simple things. Stop overthinking the troubleshooting, get back to basics, and keep those gadgets running!
 Written by Ian Poole .
Experienced electronics engineer and author.
More Test Topics:
Data network analyzer
Digital Multimeter
Frequency counter
Oscilloscope
Signal generators
Spectrum analyzer
LCR meter
Dip meter, GDO
Logic analyzer
RF power meter
RF signal generator
Logic probe
PAT testing & testers
Time domain reflectometer
Vector network analyzer
PXI
GPIB
Boundary scan / JTAG
Data acquisition
Return to Test menu . . .